
Last updated October 30, 2026
 Architectural shingles
 Metal roofing
 Tile roofing
 GAF
 Owens Corning
 Flat & low-slope
Free roof inspection with deck photos before we talk money - GAF and Owens Corning certified installation
Roof Repair Troubleshooting: Common Problems and How to Fix Them
The ceiling stain in your hallway is almost never directly below where the roof is failing. Water travels along rafters, decking seams, and HVAC penetrations before it drops, which is why patching the spot above the stain fixes nothing. In Anaheim, where we get intense sun most of the year and sudden heavy rain in winter, that hidden water path can sit dormant for months before it shows itself. This guide will teach you how to trace roof problems back to their actual source, not just their symptom.
Styles & brands we work with
Quick Answer
Roof Repair services start with troubleshooting—tracing a symptom (a stain, a leak, a missing shingle) back to its actual entry point before doing any fix. The most common problems are flashing failures, worn sealants around penetrations, cracked or lifted shingles, and condensation confused with leaks. Most repairs cost a few hundred dollars when caught early and thousands when the source is missed.
Table of Contents
- How Water Actually Travels Through a Roof
- The Five Most Misdiagnosed Roof Problems
- Flashing Failure Modes: Each Type Fails Differently
- Deck Problem, Material Problem, or Installation Problem?
- Tools and Conditions for Accurate Self-Diagnosis
- Repair or Replace: How to Know What the Roof Actually Needs
- Anaheim-Specific Roof Troubleshooting
- Common Mistakes to Avoid
- When to Call a Professional
- Frequently Asked Questions
- The Bottom Line
How Water Actually Travels Through a Roof
Water doesn’t fall straight down through a roof. It moves sideways, follows the slope, rides along rafter edges, pools behind obstructions, and drips from the lowest point it can find. A leak that shows up near an exterior wall in an Anaheim ranch house might have entered twenty feet up the roof plane, traveled along a rafter, and only dropped when it hit a knot in the wood or a seam in the decking.
Here’s the water-path tracing method we use when we inspect a roof in Anaheim:
- Mark the interior stain location precisely. Measure from two fixed points – the nearest exterior wall and the nearest interior wall corner. Don’t estimate.
- Map that point upward through the attic. Water entry is almost always uphill from the stain. Use the roof slope to determine which direction is uphill.
- Identify every penetration in that uphill zone. Look for vent pipes, chimneys, skylights, HVAC curbs, exhaust fans, and any nail or screw that goes through the decking.
- Check the attic directly above the stain first, then move uphill. Look for water marks on rafter edges, decking discoloration, or damp insulation.
- Once you find the highest water mark in the attic, measure horizontally to the nearest roof feature. That measurement points to the likely entry point, even if it’s fifteen feet from the stain.
In Anaheim’s older neighborhoods, we see a lot of homes with low-slope sections or flat roof additions. Water behaves differently on those – it ponds, sits, and finds the smallest pinhole. The tracing method still works, but you may need to look for pooling zones rather than uphill travel.
This is why a Bedrock Roof Repair home inspection always starts in the attic when there’s a leak. The interior stain tells you where the water ended up. The attic tells you where it came from.
What Stains Tell You About Timing
The color and shape of a ceiling stain reveal how long water has been moving through the roof system:
- Dark brown with a ring around it: Old, intermittent leak. The ring marks previous wet/dry cycles.
- Light yellow or tan, no ring: Recent, possibly first-time leak.
- Dark with a white center: Water has been evaporating through drywall, leaving mineral deposits. This suggests repeated wetting over months.
- Stain that grows after rain but shrinks when dry: Active leak tied directly to weather, not condensation.
A stain that appears during dry Anaheim summer months with no rain for weeks is almost never a leak. It’s condensation, a plumbing issue, or an HVAC problem. That distinction alone saves homeowners hundreds of dollars on unnecessary roof work.
The Five Most Misdiagnosed Roof Problems
We’ve watched homeowners in Anaheim buy full roof replacements for problems that needed a $300 fix. The opposite happens too – a real structural issue gets ignored because the visible symptom looked minor. Here are the five problems most often called by the wrong name.
1. Granule Loss Mistaken for Wear
Every asphalt shingle roof sheds granules. New shingles shed excess granules during the first year. Older roofs shed them steadily. Finding granules in your gutters is not, by itself, evidence that the roof is failing. What matters is whether the granule loss exposes the asphalt mat underneath. If you can see bare spots on shingles, that’s wear. If granules are in the gutter but the shingles still have a granular surface, the roof is doing its normal job. CertainTeed and GAF shingles both shed more in Anaheim’s heat than in cooler climates, and that’s expected.
2. Condensation Mistaken for Leaks
Anaheim’s cool, damp winter mornings combined with warm attic air create condensation on the underside of decking. Homeowners see water stains on attic insulation and assume the roof leaks. But condensation doesn’t come through the roof; it forms inside the attic when warm, moist air from the house rises and hits cold decking. The fix is attic ventilation and air sealing, not roof repair. A roof replacement won’t stop condensation. Only airflow will.
3. Nail Pops Mistaken for Wind Damage
A nail pop is a nail that has backed out of the decking, lifting a shingle slightly. It looks like a small bump or tent in the shingle line. Wind damage, by comparison, is a shingle that’s been lifted and creased or torn. Nail pops happen due to temperature swings, decking movement, or installation with the wrong nail length. They’re a simple fix – reseat the nail, seal the hole, done. Wind damage may require shingle replacement. Calling a nail pop wind damage either overcharges you for a simple repair or under-repairs a genuine wind event.
4. Flashing Sealant Failure Mistaken for Flashing Failure
Flashing is the metal or membrane that redirects water at roof transitions – walls, chimneys, valleys, pipes. But most “flashing failure” calls we see in Anaheim are actually sealant failures. The caulk or sealant around a pipe boot or chimney flashing dries out in our sun, cracks, and lets water in. The metal flashing is fine. The fix is removing the old sealant, cleaning the surface, and applying a proper roofing sealant. That’s a $150 repair, not a $1,200 flashing replacement.
5. Shingle Blistering Mistaken for Hail Damage
Anaheim rarely gets hail. What homeowners sometimes call “hail damage” is actually blistering – small raised bubbles on the shingle surface caused by trapped moisture in the shingle mat expanding in heat. Blistering is a manufacturing issue or a ventilation problem, not storm damage. Real hail damage has a distinct pattern: random pockmarks across many shingles with broken edges and exposed mat, usually accompanied by damaged gutters, downspouts, and window screens. If you see pockmarks on the roof but no other damage on the property, it’s probably not hail.
Flashing Failure Modes: Each Type Fails Differently
Flashing is the most common source of roof leaks, and every type fails in its own way. Knowing which type you’re looking at tells you what the repair will involve before anyone climbs a ladder.
Step Flashing
Step flashing is the L-shaped metal pieces woven between shingles where a roof meets a vertical wall. Each piece overlaps the one below it, and each is covered by a shingle. Step flashing fails when the metal corrodes through, when the pieces get knocked out of place, or when the wall siding covers too little of the flashing’s vertical leg. The repair involves lifting shingles along the wall line, replacing the damaged pieces, and re-sealing. On Anaheim homes with stucco walls, step flashing work sometimes requires cutting a small channel into the stucco to seat the flashing properly – a job best left to a roofer.
Counter Flashing
Counter flashing is the second layer of metal installed over step flashing or base flashing, typically embedded in a wall or chimney and bent down over the lower flashing. It fails when the embedment mortar cracks, when the metal pulls away from the wall, or when sealant at the top edge dries out. Water gets behind the counter flashing and runs down inside the wall cavity. The fix is re-mortaring the embedment or replacing the sealant, not replacing the entire flashing system.
Valley Flashing
Valley flashing sits in the V where two roof planes meet. It carries a large volume of water during rain, which is why it’s the first place we check when Anaheim gets a winter downpour. Valley flashing fails when it corrodes through, when debris accumulates and holds water against the metal, or when the valley was installed with exposed fasteners that leak. A valley repair may involve replacing the metal, or on roofs with woven valleys, re-weaving the shingle courses.
Pipe Boots
The rubber boot around a plumbing vent pipe cracks and shrinks over time, especially in Anaheim’s UV exposure. The neoprene or EPDM rubber dry-rots, the pipe penetrates through, and water follows the pipe into the attic. This is the single most common leak source on any asphalt shingle roof. The repair is usually a replacement boot slid over the pipe and sealed to the shingles – a straightforward job, but one that requires cutting the old boot off and sometimes lifting a shingle or two. Tamko and IKO both offer replacement boot systems designed for retrofits, and the market has solid universal boots as well.
If you want to understand what’s happening on your roof before calling a contractor, a Roof Inspection in Anaheim walks you through every flashing type, shows you photos of what we find, and gives you a written condition report. No obligation to do work afterward.
Deck Problem, Material Problem, or Installation Problem?
Before committing to any repair, it’s worth separating the three possible layers of a roof failure. They require different fixes, different budgets, and different levels of urgency.
Deck Problems
The deck is the plywood or OSB layer the shingles are nailed to. Deck problems include rot, delamination, sagging between rafters, and water damage from long-term leaks. If the deck is compromised, no shingle repair will hold. The shingles are only as solid as what they’re nailed into. In Anaheim, we most often see deck rot around penetrations – chimney bases, pipe boots, skylights – where slow leaks have gone unnoticed. Deck repair means replacing the damaged section, which usually requires opening the roof and replacing shingles over that area.
Material Problems
Material problems are defects or age-related failures in the shingles themselves: cracked shingles, blown-off tabs, granule loss exposing mat, curling, or blistering. Material problems may be repairable shingle-by-shingle if the damage is isolated. If the material is failing across large sections, replacement becomes the honest recommendation rather than continued patching. Brands like GAF, CertainTeed, Owens Corning, IKO, Atlas, Tamko, and Boral all manufacture materials with different performance characteristics, and the right replacement material depends on your roof’s slope, orientation, and the Anaheim sun exposure.
Installation Problems
Installation problems are mistakes made when the roof was originally installed: shingles nailed too high, nails overdriven through the shingle, wrong overlap, inadequate starter strip, missing underlayment, or flashing installed out of sequence. These failures often show up within the first few years and cluster in patterns. If you see leaking in multiple locations that don’t connect to any single penetration, or shingles lifting in rows, you may be looking at installation issues. The fix may be isolated repair or, in severe cases, a re-roof of the affected sections.
Understanding which layer is failing changes the conversation. A contractor who tells you “the roof is bad” without specifying deck, material, or installation hasn’t done the diagnostic work. When we evaluate a Roof Repair in Anaheim, we identify the layer first, then price the fix accordingly.
Tools and Conditions for Accurate Self-Diagnosis
You don’t need to be a roofer to gather useful information before calling one. But you do need the right conditions and a few basic tools. Here’s what to do before picking up the phone.
The Dry Day Method
Never inspect a roof problem while it’s actively raining, and never walk a wet roof. The water masks the entry point, and the surface is dangerously slick. Wait for a dry day in Anaheim, then follow these steps:
- Clear the gutters. Debris hides granule loss and blocks water flow, creating leaks that don’t exist when gutters are clean.
- Take photos of the interior stain. Date them. You’ll want to compare after the next rain.
- Go into the attic with a bright flashlight. Look for the highest water mark, not just the wettest spot.
- Check for daylight. Turn off attic lights and look for pinholes of daylight through the deck – those are entry points.
- Map every penetration. Draw a rough sketch of the roof overhead and mark vents, pipes, and chimneys.
The Garden Hose Test
If the leak is active and you know approximately where it enters, a controlled water test can confirm the exact spot. One person runs a garden hose on the roof in small sections while the other watches the attic. Start at the lowest suspect point and work uphill. Run water on one section for two to three minutes before moving. The moment water appears in the attic, you’ve found your entry zone. This test works best with two people and clear communication – call or text between attic and roof. Never run water near electrical boxes or attic wiring.
What You Can See From the Ground
You don’t need to climb a ladder for a preliminary check. From the ground with binoculars, look for:
- Curling or lifting shingle edges
- Missing granules reflected as shiny spots
- Sagging ridge lines
- Debris piles in valleys
- Cracked or missing pipe boots
- Staining on exterior walls below roof edges
If any of these are visible, make a note and share it when you call for a Bedrock Roof Repair home estimate. It gives us a starting point before we even arrive.
Repair or Replace: How to Know What the Roof Actually Needs
The most common question homeowners ask us in Anaheim is whether they can repair or need to replace; for Roofing Cost Breakdown: The Anaheim Homeowner’s Reference for 2026, check our guide. The honest answer depends on a few specific factors.
Repair makes sense when:
- The damage is isolated to one or two specific areas
- The decking underneath is dry and solid
- The shingles are less than 15-18 years old and in generally good condition
- The failure is flashing-related, not material-related
- There’s no evidence of widespread granule loss or curling
Replacement makes sense when:
- The decking is rotting in multiple locations
- Shingles are curling, cracking, or losing granules across large sections
- The roof is older than 20 years and repairs are becoming frequent
- Multiple flashing systems have failed simultaneously
- You’re planning to sell and the roof condition would affect the sale
We’ve repaired roofs in Anaheim that other contractors had quoted for full replacement, and we’ve recommended replacement on roofs where the homeowner had been paying for repeated patch jobs. The key is looking at the whole system, not just the visible symptom. Seven leading brands – GAF, CertainTeed, Owens Corning, IKO, Atlas, Tamko, and Boral – give us options for any replacement, but we don’t push replacement when a targeted fix solves the problem. “Repair when possible. Replace when necessary. Inspect before either.”
If you’re weighing the decision, start with a thorough Roof Replacement in Anaheim evaluation alongside a repair assessment. You’ll get a clear picture of what each path costs and how long each will last.
Anaheim-Specific Roof Troubleshooting
Anaheim’s climate creates roof problems that homeowners in other regions don’t face. We don’t get the freeze-thaw cycles of the Midwest or the constant humidity of the Southeast. What we get is prolonged UV exposure, Santa Ana winds, and sudden winter downpours after months of dry heat.
The UV factor is the biggest driver of roofing material aging in our area. Summer temperatures regularly exceed 90 degrees, and that heat bakes shingles from above while attic heat pushes up from below. The result: shingles dry out, become brittle, and lose flexibility faster than in cooler climates. Granule loss accelerates, and sealant around flashing dries and cracks. Many of the “leaks” we see after the first winter rain in Anaheim are actually UV-degraded sealants that finally gave way.
Santa Ana winds hit hardest in the fall, often reaching 40-50 mph gusts in exposed areas of Anaheim and the surrounding hills. Those winds lift shingle edges, tear off loose flashing, and drive debris into valleys. After any significant Santa Ana event, it’s worth checking the roof from the ground for lifted shingles or displaced flashing. A lifted shingle acts like a sail – the next wind event tears more of them off.
The winter rain pattern creates another specific challenge. After months of no rain, the first heavy storm hits a roof that’s been drying and shrinking. Sealants have pulled away, small cracks have opened, and the first storm finds every weak point at once. The leak that “suddenly appeared” was often developing for six months. When we do a Roof Repair in Anaheim, we look for the entire cluster of weak points, not just the one that leaked first.
Anaheim also has neighborhoods with older homes built in the 1950s and 1960s – homes with original framing, older decking, and sometimes multiple roof layers. These roofs need careful evaluation because the decking itself may be a factor. Homes in the Anaheim Hills area face additional wind exposure and western sun in the afternoon, which accelerates material aging on those slopes.
Common Mistakes to Avoid
- Patching the ceiling stain without finding the source. The stain is the endpoint, not the problem. Water travels, and the patch will fail within months.
- Applying roof sealant to shingles as a general fix. Sealant on shingles traps moisture, accelerates granule loss, and doesn’t address the underlying issue. Sealant belongs on flashing joints and penetrations, not shingle surfaces.
- Assuming a new roof means no leaks. Installation errors on new roofs are common. If a new roof leaks in Anaheim, the issue is usually flashing sequence or sealant, not the shingles themselves.
- Ignoring small stains because they “only happen when it rains hard.” Intermittent leaks are still leaks. The water is damaging decking and insulation even when it doesn’t show on the ceiling.
- Walking on the roof to inspect without knowing load points. Every step on a shingle roof risks damaging shingles, especially in hot weather when they’re soft. If you’re not sure where to step, stay off and use binoculars from the ground.
- Choosing a repair based on the lowest bid without asking what’s included. A $200 “patch” that doesn’t address flashing or sealant is a temporary band-aid. Ask what the repair includes and why that specific fix is recommended.
- Waiting for a dry season to fix a leak. In Anaheim, the dry season is long, but the next storm will find the same entry point. Leaks don’t improve over time; the damage compounds.
When to Call a Professional
You can troubleshoot from the ground and the attic, but some situations require a trained roofer. Call if you see sagging decking, daylight through the roof, water running down interior walls, or any sign of structural movement. Steep slopes, two-story homes, and any roof with tile or slate are not DIY territory. If the leak has been active for more than one rainy season, the decking may be compromised even if it looks solid from the attic side. Bedrock Roof Repair offers free estimates in Anaheim—call (833) 589-7850 if you’re unsure what you’re looking at, or read our Roofing Emergency Preparedness Guide for Anaheim Homes first. We’ll tell you what your roof actually needs: repair, replacement, or nothing yet.
Frequently Asked Questions
Most roof repairs in Anaheim fall between $300 and $1,200 depending on the type of repair. A simple pipe boot replacement or sealant refresh runs $150 to $350. Flashing repair around a chimney or wall usually costs $400 to $900. Deck section replacement can exceed $1,500 depending on the size and accessibility. The exact cost depends on what we find during the inspection. Call (833) 589-7850 for a free estimate – we’ll give you a written quote before any work starts.
No. Interior patches cannot stop a roof leak. Water enters from outside, and any fix must happen at the entry point on the exterior. An interior patch will fail and allow the water to find a new path, often spreading the damage further. The interior work you can do is diagnostic: find the highest water mark, map the entry point, and document what you see for the roofer.
The first heavy rain after Anaheim’s long dry season finds every cracked sealant joint, dried-out pipe boot, and small gap that developed during the hot months. Roofs shrink slightly in dry heat, and sealants pull away from metal and masonry. When rain finally arrives, these small openings let water in. Most first-rain leaks are sealant failures around flashing and penetrations, not shingle failures.
Most repairs we do in Anaheim are completed in one visit lasting two to four hours. More involved repairs like flashing reconstruction or deck replacement may take a full day. Weather can affect scheduling, but we work around Anaheim’s rain patterns to get repairs done before the next storm.
It depends on the roof’s condition, not just its age. A 20-year-old roof with solid decking, intact shingles, and functioning flashing can be repaired and may last several more years. A 20-year-old roof with curling shingles, granule loss across the surface, and multiple leaking penetrations is usually a better replacement candidate. We evaluate the full system before recommending either path.
Yes. We install and repair asphalt shingles, tile, metal, and flat roof systems. We source materials from seven leading manufacturers – GAF, CertainTeed, Owens Corning, IKO, Atlas, Tamko, and Boral – which means the recommendation matches your roof and budget rather than a single supplier’s product line. Call (833) 589-7850 to schedule an inspection, and we’ll assess your specific roof type.
The Bottom Line
Roof problems are almost never where they appear. The stain on your ceiling is the endpoint of a water path that started somewhere uphill, often fifteen feet away, at a failing pipe boot, cracked sealant joint, or displaced flashing. Learning to trace that path before calling a contractor saves you money and prevents recurring repairs; see our more guides & resources for additional help. In Anaheim, where UV damage and sudden winter rains create predictable failure patterns, a systematic approach beats a reactive one every time. If you’ve found a leak or want a professional assessment, call (833) 589-7850 to schedule a free estimate. We’ll trace the problem to its source and tell you exactly what your roof needs.
Written by the team at Bedrock Roof Repair, serving Anaheim since 2018.
See the difference
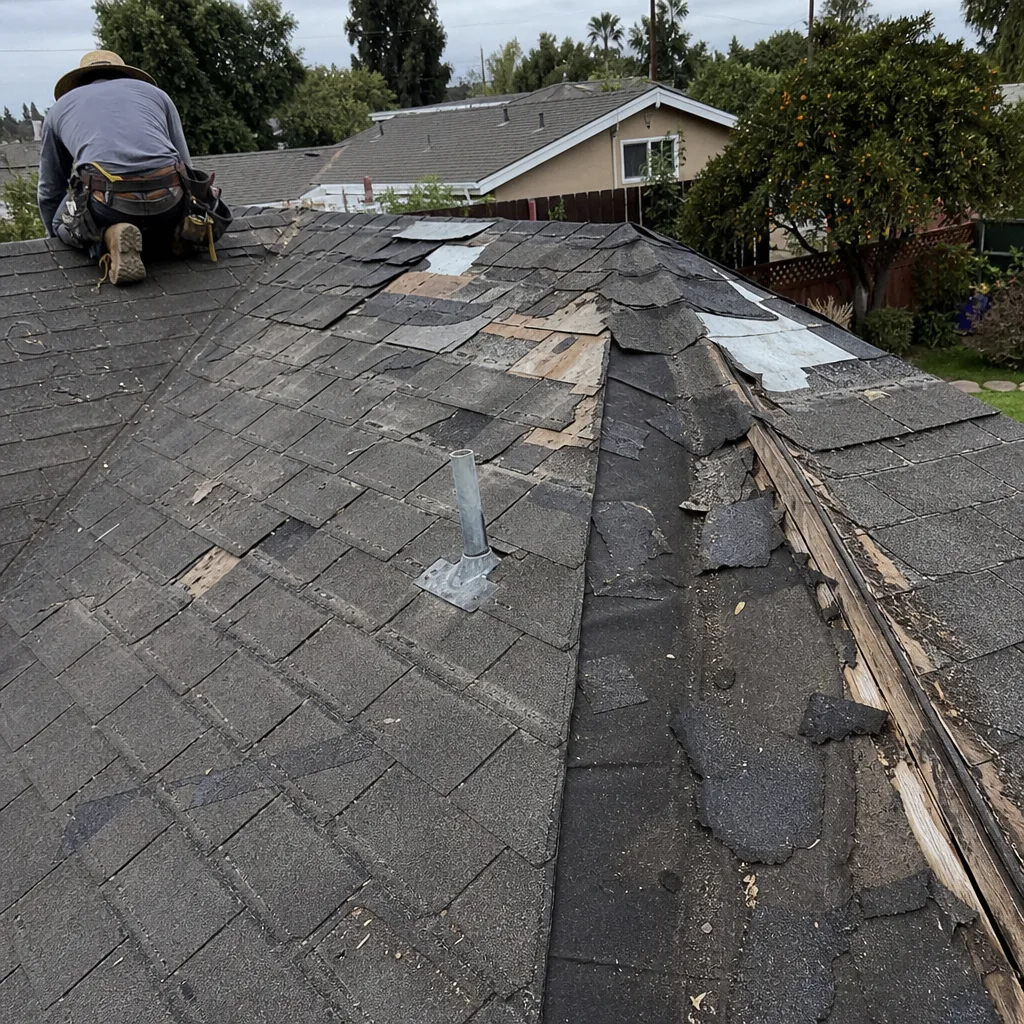 Before
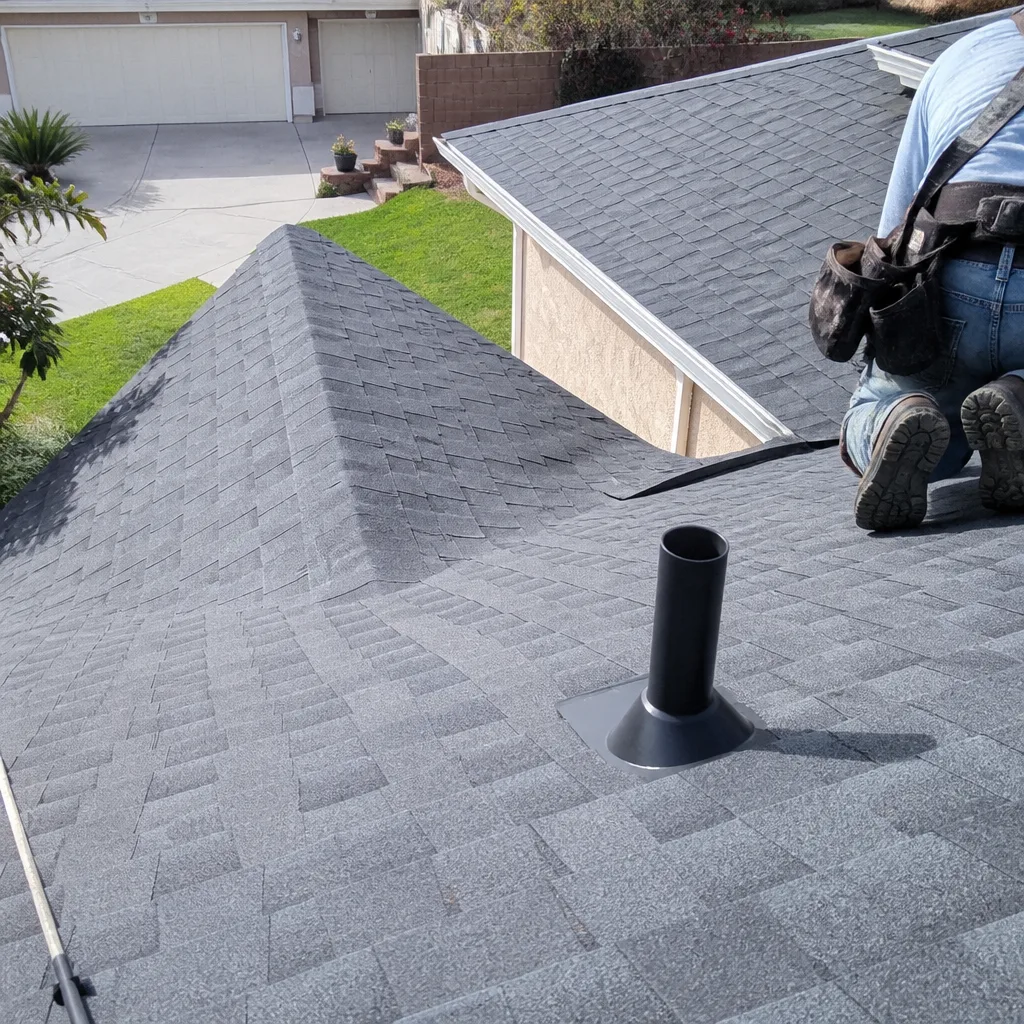 After
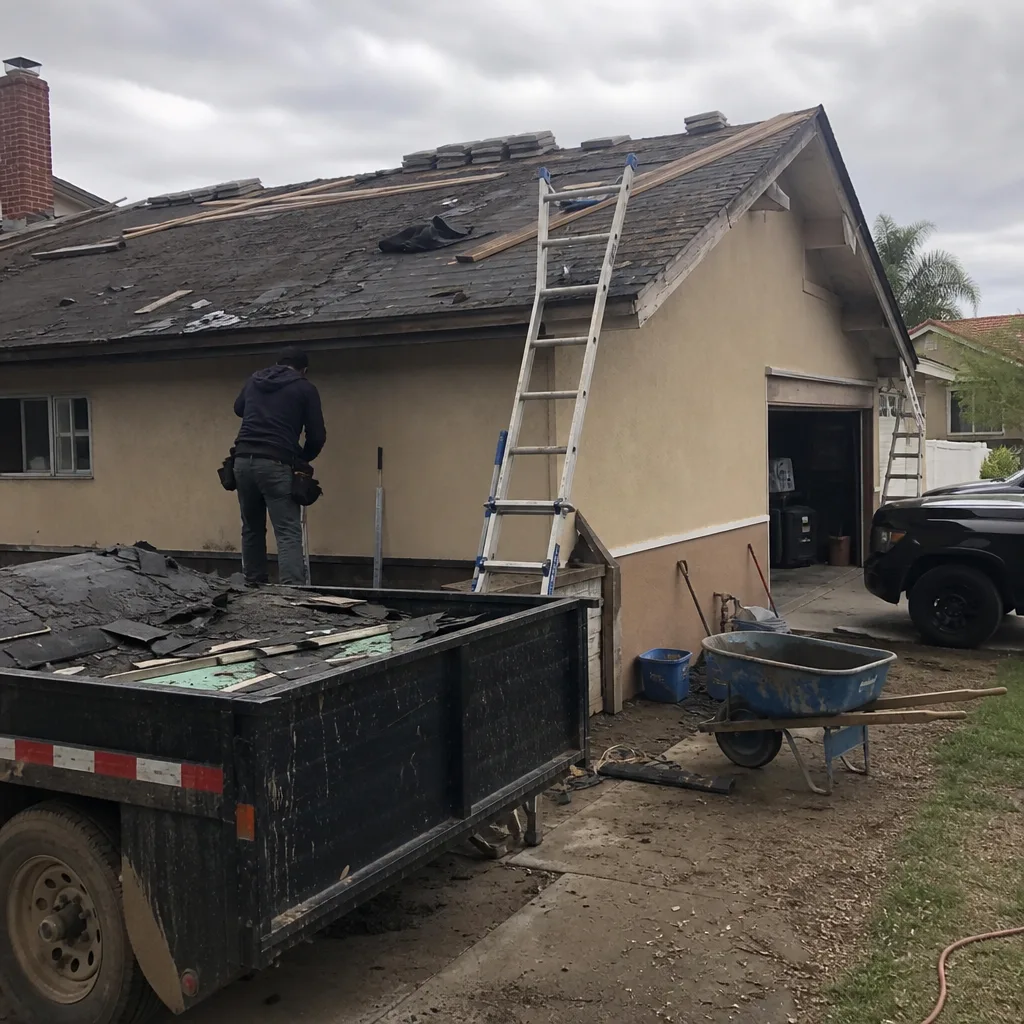 Before
 After
 Before
 After